Showing posts with label preschool. Show all posts

Sunday, 15 March 2020

How Water is Transported in Plants

I bought the cheapest bouquet of white flowers from ASDA (£2!) and put them in a vase at home. Unfortunately, I forgot to take a note of the plant name for future reference. 😅


We talked about why we needed to put them in water (because plants need water to survive!) and why I added the plant food to the water (for nutrients) and why the label said the plants would only stay alive for a maximum of around 8 days (because they had no roots and weren't in soil).

So if they had no roots then how were they able to get water inside them? The water must be able to travel up the stem somehow...

We read about it in a couple of our science books and talked about how the water travels to all different plant parts/structures, i.e. from the roots into the stem and then to the leaves and flowers.

Was there a way we could see if it was true? One of the books mentioned an experiment with celery, so maybe we could do the same thing with our white flowers? There was a reason I chose white flowers to begin with! So the colour change would be more apparent. 😁

We took one of each stem and put them in 4 different glasses. In one glass we filled it with just clear water. In the other three we added red food colouring, blue food colouring, and a mixture of red and blue food colouring to give purple water. We set up the 4 glasses on the windowsill in the morning so we could keep checking on them throughout the day. I also used a whiteboard pen to mark the water level; what did they expect to see happen? The water level should go down as the water's sucked up by the plant!

So what did the girls think would happen to the flowers? What was their prediction? That we would see the flowers change into the same colour as the water in the glass. Why did we have a glass with just clear water? As the control, to make sure the flowers weren't just going to change colour anyway!


After a few hours we didn't see any change, so we decided to leave them for longer. M commented that the water hadn't really gone down at all from the starting lines either!

In the meantime, we watched this video: Ivy's Plant Shop - How does water get from the roots to leaves of a plant? The girls commented their prediction should be correct because the petals in the video changed colour!


We ended up leaving the flowers for a few days while checking on them... The water level went down a little, but the change in the flowers was really mild! I checked online for a possible reason and it turns out that the change in flowers with woody stems takes longer. 😓 But never mind, it just led to more discussions about "failures" in science leading to further experiments and how multiple experiments/repetitions mean more reliable results!

Tuesday, 10 March 2020

Identifying Plant Structures & Functions

We did a lesson on plant structures and functions a couple of years ago, when the twins were 4 1/2, so I thought we would repeat it now they're older (to see how much they remember/have improved!) and for Z's sake as a new lesson as she's recently turned 4. 😙

As before, we visited the Botanical Gardens. In the morning before we went, we read through the most relevant pages from the Roots, Stems, Leaves and Flowers book from the Fundamental Science Collection we have.

While at the gardens, we discussed the different kinds of plants and commented on how the same structure (e.g. the flower) could look so different on different plants. Did they all have roots and stems? Including trees? Could they find them? We stopped at a couple of points around the gardens so the girls could have a go at drawing some plants. They've not done much drawing from life so this was good practise! Z wanted to do one at first, but then she preferred just running around so I didn't force it. 😊 I modelled how to do a quick sketch first and then adding more detail afterwards.

This tree was outside, so after they identified the different structures I asked them what they thought about its trunk. Why was it twisted? Did it grow like that naturally or did someone make it grow like that? How? F said maybe they kept twisting the trunk as it grew. I'm not sure of the answer myself but that seems like it could make sense?! Maybe it's two different trees being twisted together as they grew? Even if we don't know the answer, thinking about it is still a useful exercise. 😁


We also took photos of the plants they were sketching. At home, they watched how I inserted a picture into a Word file and arranged it on the page. Then they had a go with the other photos we took. As well as inserting images, we paid special attention to cropping, resizing, moving them and using zoom to be able to see more clearly what we were doing. I printed the pictures out and they used them as reference to colour in their sketches with coloured pencils.


I was going to get them to label their drawings, but decided against it as felt it would be labouring the point... They already showed they understood by doing it verbally at the gardens, so what was the use in creating extra work as "evidence"?! 😏


On another day, we watched this video clip from the BBC: Ivy's Plant Workshop - Parts of a Plant.

The twins completed the following worksheet, with the guidance that the bottom of the flowering plant should be at the bottom of the table and the top should be at the top... They could either draw four separate diagrams or have a go at joining them to make one tall diagram spanning the table! We talked about the four structures (roots, stem, leaves, flowers) and their multiple jobs, and I wrote some keywords (mainly as spelling help!) on the whiteboard. If they needed more help, they could look in one of the Science books they have which I'd put in the book box for this half term.


When they were done, I asked them to draw and label a tree with the same four labels.

You can download the simple worksheet here.

Meanwhile, Z did the activity from our previous post, i.e. drawing a picture of a flower from scratch and me guiding her with adding labels. MashAllah the twins were able to work pretty independently so I was able to give Z enough attention!

Saturday, 29 February 2020

What plants need to grow

Our Science topic for this half term is plants: looking at what they need to grow, their basic structures and functions, and their life cycles in terms of flowering, pollination, seed formation and dispersal.

We were gifted a carnivorous plants display from my parents - which I've been putting off planting over the winter as we were back and forth between Ipswich and Birmingham so wouldn't have been able to look after them well - so we finally got round to planting those! We also had a few flower seeds from my nephew's birthday party so we planted those too.


I asked the girls what they thought the plants needed to grow well - what did they already know? They said water, light and soil because they remembered our sunflower experiments in the garden from previous years. 😁🌻🌻🌻 We looked in one of their science books about plants so they could check and they remembered plants also need air - because they "breathe" in carbon dioxide and breathe out oxygen, which is the opposite of what animals do.

I told them I was going to put their flowers and carnivorous plant display on the sideboard where they could get lots of sun because I wanted them to grow well, inshaAllah. And we needed to remember to water them often! They were already in soil and they weren't covered up so should be able to get plenty of air.

Then I asked them if we could design an experiment to test if they were right about these four factors being important for plant growth... We could use cress seeds and see what happens if we tried to grow them without those things. Could they design an experiment to see which one of those things is the most important, maybe? How could they make it a fair test?

With some  discussion, they came up with the following:


They both found the "no soil" pot hilarious for some reason. 😂😂

Z didn't really take part in the designing an experiment part, but she understood we had 4 different pots to compare how the seeds would grow without either light, water, soil or air. And the 5th pot had all four things to be the control, so to show how the plant is supposed to grow.

Once the cress has sprouted, inshaAllah, we can discuss what they'll observe and why it happened. 🌱🌱🌱🌱🌱

Friday, 14 February 2020

Writing Informal Emails

Part two of learning about letters was to compare to writing and sending emails!

First, the twins did a comprehension exercise based on an email text (from this book) and we talked briefly about the conventions in layout: the email subject, email addresses, the similar layout in terms of paragraphs and a "Dear...", "From..." beginning and end.

Then, I set up email accounts for the girls - including Z, as she had written a letter and posted it too - using Gmail. In hindsight, I wish I had adjusted their birth years so I could automatically forward their emails to mine (Google doesn't allow automatic forwarding for child accounts! And neither can I add their accounts to my phone as I set my email as the parent account which is already signed in on my phone... Settings might get confused, apparently, so it's not possible 😖) as now I need to manually log in to their accounts to check for replies... But this is a lesson in itself for them re: the conveniences of snail mail vs electronic! It may arrive there straightaway but that isn't much use if you forget to sign in and check. 😂

They watched me set up their accounts (the username F wanted was already taken so we added a number to the end; we talked about how usernames/email addresses are unique for everyone in the whole world!) and came up with a password (their first one lol... I set all 3 as the same for ease 😝).

When they composed their emails, in turn, we looked at the layout of the inbox, how to write an email by clicking "compose", what the subject line is for and where to put the recipient's address. They wrote a simple email to the same aunts they had sent letters to, explaining they were comparing the two forms of communication, and added emojis to their emails (which they enjoyed the most lol).

We talked about how email is free to do, how long it takes to arrive, the convenience of not needing to physically buy stamps or walk to a postbox and how mistakes in an email can be easily corrected, compared to rubbing out or crossing out written mistakes in a letter. We also didn't need to write the date or our own address because it was put there automatically for us.

So what could be the benefits of sending letters by post? Because you don't have to remember to check for a reply, it just comes! And if you want to send something (like Nani sent a present in the post to us) then you can't email it, you have to post it... And it's fun getting post. 😂

Tuesday, 11 February 2020

Writing Informal Letters

I bought the books The Jolly Postman and Dragon Post from Amazon as an introduction to the topic. We also watched the relevant episode of Let's Play on Amazon Prime (the twins are getting a bit old for this but still enjoyable for Z!).

We looked at the layouts of the different letters in the books to see if there was anything they all had in common - what were the features of a letter? Was there a difference between letters from friends (informal) and letters from businesses (formal)?

On a piece of coloured A4 paper, we wrote our own example letter (to Julian from Aunt Fanny - Famous Five themed again, their choice!) then glued in the centre of A3 paper and annotated it with the features we came up with.


Why is it useful to write your own address in the corner? So the recipient has it if they want to send a reply! Why is it useful to have the date? Because the letter won't arrive straightaway so it's good to know when it was sent!

We talked about how letters get to where we want them to go to and watched a couple of YouTube videos about Royal Mail - one posted only a few years ago and the other 10 years ago. We talked about how clever the machines were and how they hadn't really changed in 10 years... But before the machines were invented it must have taken a lot longer and been a lot more difficult!

We thought about who they could write letters to - who lived in the UK but not in Birmingham? Z cleverly commented there was no point wasting money posting letters to people in Birmingham because we could just give it to them instead! After going through all the possibilities they decided to write a letter each to some of my sisters living in different places (at school in Ipswich, university in Bristol and work in Leicester!). We thought it would be interesting to see if they would all receive their letters at the same time if we posted them all into the same postbox at the same time...

We looked into the difference between 1st class and 2nd class post. 1st class is meant to arrive the next working day ("What's a working day?!") including Saturday; 2nd class can take 2-3 working days to arrive. So we decided to use 2nd class for our experiment. We also talked about which kind of stamp cost more and why.

They wrote their letters, using the annotated poster from before as a guide, and we talked about the conventions of an envelope: stamp in the top right corner, address in the centre with the recipient's name at the top & postcode at the bottom, return address on the back.


We walked down the road to the nearest postbox for them to post their letters. While there, we read the information about last collection times and looked for the keyhole and handle to open the postbox. M was pleased she could explain what the "line" was down the side of the postbox - it's the door! It was a bit of a cold, windy day (remnants of Storm Ciara from the weekend!) so we talked about the inconvenience of needing to go out to send a message to someone faraway, as opposed to the technology nowadays of phones, emails and WhatsApp, etc. - all of which are sent straightaway and don't take days to arrive!

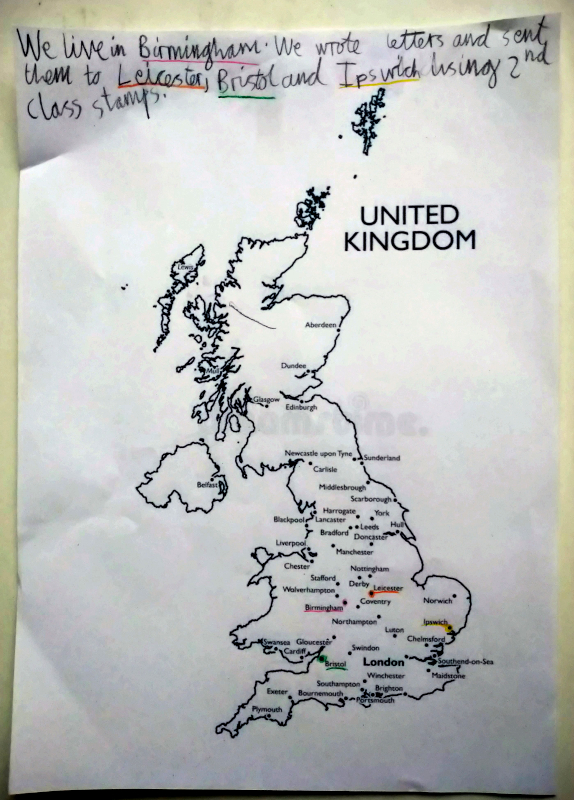
I found a simple map of the UK on Google Images which had Birmingham, Leicester, Bristol and Ipswich marked and printed it out for the girls. They needed to find the four cities and colour them different colours, then write a couple of sentences to explain what we had done.


When the letters arrive InshaAllah they can add at the bottom how long it took for their aunts to receive them! They're expecting Ipswich to maybe take longer because it's the furthest away, and Leicester to be delivered the quickest, but we'll see. 😁

Tuesday, 10 December 2019

Counting on & Square numbers

Z has known how to count up to 100 for a while... I'm not sure where she learnt it - from her sisters probably! And has recently randomly started doing addition on her fingers, e.g. she'll come to me while I'm cooking and say "4 plus 3 is 7!" while holding up her fingers to show me... So I thought I should probably put some effort in too and help her addition skills improve. 😅

Firstly, she hadn't got the hang of counting on when doing addition - i.e. she would count the fingers on one hand from 1 before counting on the fingers from the other hand, rather than just start at 4 and count on from there. So I asked her "What's 7 plus 7?" Of course, she couldn't do it on her fingers because she didn't have 7 fingers on each hand!

So we took out the multilink cubes and she chose two colours - red and black - to represent each number in my questions. She counted out 7 red cubes and 7 black cubes, then (starting from 1 again!) counted them all to 14. I covered the red pile with my hand and told her we know this pile is 7, so we don't need to count it again! And modelled counting on with the black blocks to get to 14.


We did another couple of questions like this with the blocks (e.g. 8 + 4, 6 + 9, so answers between 11-20) and I would cover the larger number with my hand after she'd counted out the blocks so she could count on with the smaller number. Then I would uncover the pile and she could count them all to check her answer was correct.

Then I asked her if she needed to count out the blocks for the bigger number at all, because I was covering the pile anyway! And she said no, but where should she put the number then? I lightly squeezed the top of her head with my hand and said to put the number in there (I found when teaching the twins when they were younger that this physical action helped them!).

I asked her what 8 + 5 was. Which was the bigger number? 8. So where does it go? In your head (*squeeze for emphasis)... Without prompting she then counted out 5 blocks. I touched her head to remind her 8 was in there then she used the blocks to help count on to 13. 😄

Final stage: I asked her if she could do bigger numbers like 15 + 4 then? And could she use her fingers to help in case she didn't have any blocks? She touched her own head (15 in here...) and counted on to 19 using 4 fingers. Last question, 22 + 8? Same method, she worked out it was 30! MashaAllah. 💪 When Papa came home later she was happy to show him she could now do maths with bigger numbers! And I was happy to see she'd retained what I'd taught her earlier. 😂💕

----------

While I had the blocks out, I decided to use them afterwards for the twins as an introduction to square numbers.

They have a multiplication grid poster in their bedroom and F had asked that morning why the numbers in a diagonal line were coloured differently to the rest. M straightaway answered because they were in a pattern of 1 x 1, 2 x 2, 3 x 3... So we went downstairs and I wrote these out to 5 x 5 on the whiteboard, with the answers, and an array of dots for each one to explain why they were called square numbers.

Fast forward to these blocks again - so several hours later - I asked the twins to use them to make as many square numbers as they could while I put A down for her nap.


MashaAllah they made these (and were also able to tell me they had used 91 blocks because there were 9 left over!) so I thought I'd quickly recap area while here...

E.g. how many cubes are in the square for 6 x 6? 36. So if I had a field and one side of the field was 6m, what would the area of the field be? They quickly answered 36 (and I filled in the m² units for them - I'm not interested in units at the moment so didn't want to dwell on them at this point). I asked similar questions for other square numbers in the context of word problems such as areas of walls, books, rooms, boxes, etc. Then to be sneaky I threw in a question on perimeter. They both fell for it. 😂 But when I repeated the question emphasising the word perimeter they laughed at themselves and were able to give the correct answer. MashaAllah. 😁😁

----------

While we're on the subject of maths, I'm going to put this here as a nice reminder of how the twins have different personalities and ways of thinking... Some of their answers to a worksheet they did the next day...

F, trying her hardest, but sometimes not seeing the wood for the trees:


M, being calm, laid-back and not making life difficult for herself:


😂👍

Thursday, 21 November 2019

Seerah timeline (6-8)

Continued from this post...


Open Preaching

Coincidentally, the week we covered this part of the seerah, the Big Life Journal email that week (I recommend signing up to the free emails if you haven't already!) happened to be linked with a similar lesson to do with overcoming challenges: "Trees stand strong despite high winds because their roots are deep. Similarly, we can stand strong despite the challenges in our lives because we have deep roots which support us: loving people, thoughts, beliefs, values, and so on."

So as part of our reflection on this part of the Prophet (SAW)'s life, we completed the week's Big Life Journal activity together and stuck the finished poster in their bedroom, while reminding ourselves of the Muslims at the time going through their challenges (i.e. ridicule, torture, the boycott, etc.) but never giving up their faith.


We coloured a quarter of the poster each, since it printed on to 4 A4 sheets it was simplest to divide up the work this way (myself, the twins and Z) - and this also represented teamwork and the fact we all share the same roots with each other. I took this opportunity to teach the girls about blending and hues by having us all use colouring pencils. I demonstrated applying different pressure using the same pencil and the effect it had on the colour, as well as colouring lightly with two colours on top of each other so the change between two colours isn't so apparent.

Year of Sadness

We talked about why this time of the Prophet (SAW)'s life is known is the Year of Sadness/Sorrow, how he must have been feeling and why he was able to continue his mission despite that.

Continuing the theme of being strong like a tree, we compared this sadness to a huge challenge and Allah's love and Muhammad (SAW)'s strong faith as being his roots.

I Googled some random photos of landscapes to show the children, first "summer day landscape" then "icy landscape" and asked them how the pictures made them feel - what mood did they give and did they make you feel warm or cold? Then we Googled "flower field landscape" and talked about why these photos made us feel warm and happy - what did they have in common? Bright colours... What kinds of colours? Reds, oranges, yellows and they also said bright blues and greens. I Googled "cold colours landscapes" to show the girls and we talked about why these photos made us feel cold... They were mostly blue, purple and grey colours and they were dull not bright. Finally I googled "warm vs cold colours" to show them a diagram to illustrate that, yes, they were right and the red-orange-yellow side of the colour wheel is associated with warmth whereas the green-blue-purple side is cold.

Bringing them back to the main topic, I asked them if we were to paint something to represent this time of the Prophet (SAW)'s life, which kinds of colours would give the right mood? They answered the cold colours.

As we were talking, I was still scrolling through the example pictures on Google and we came across this one:

I really liked how it showed the contrast between the warm/cold colours in one picture. That's when I had the idea to create a similar painting rather than just doing one to convey a sad mood, and to link it to the growth mindset idea of being strong like a tree.

On a piece of A4 card, I demonstrated with Z how to draw round their hand as if it were the roots of a tree, their arm the trunk, and to flip the paper round to draw in the outline of the leaves at the top. This tree represented them and they were going to colour it in with all warm colours to show their strength, whereas outside the tree they were only going to use cold colours to represent the challenges they might come across - just as the Prophet Muhammad (SAW) still had Islam keeping him strong and warm inside despite everything going on outside him (e.g. Abu Talib and Khadijah passing away, being treated even worse by the non-Muslims, being stoned at Taif) which actually wanted to make him feel very sad and cold.

Because A needed her nap just then and I couldn't leave them unsupervised with the paints, the twins and Z agreed to use wax crayons to colour their tree and save the watercolors for the background. I said this was a good idea because the wax crayons would stand out more against the paint. They chose what they thought were the warm coloured crayons from the box, including some pinks and purpley-reds. I didn't correct them as I wanted them to experiment with the colours and see if they gave the desired effect... Once they were done colouring the tree it really did give a warm feeling overall, but once they painted in their backgrounds suddenly the purpley-reds stood out as being cold! We talked about why (the background colours made the purpley-reds look more purple) and they decided to go over these parts of their trees with orange and yellow paint, which helped make their tree feel warm again overall. A mistake which turned into a learning experience, and another thing to illustrate the importance of mistakes in helping us grow!


Isra' & Mi'raaj

I thought there wasn't a much detail in the 365 Days book as I would have liked, so I looked through the other books we had and was pleased to see this part of the seerah covered a little more in book 3 of the Safar series. So I read both the chapter from this book as well as the relevant pages in the 365 Days book for the girls to then write their fact summaries.

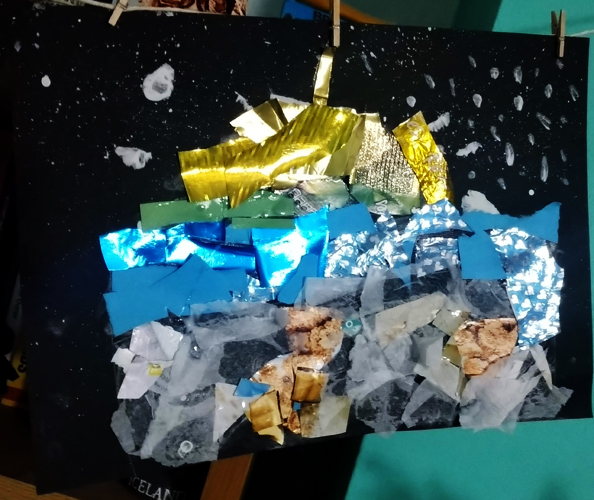
Bringing in our work on shiny surfaces and light reflecting, I thought it would be nice to do a collage of the golden dome at al-Aqsa. I read the chapter from Goodnight Stories with the Prophet Muhammad as a recap (we did this the following day) and the girls talked about which materials would be good to create the shiny golden effect of the dome.

We've not done any proper collaging before, so this was a good opportunity to cover another new thing from the art curriculum I shared in a previous post!

I left this page from the book open as inspiration:


We also looked at some photos of Al-Aqsa from Google and talked about how to draw it simply - they came up with a long rectangle with a semi-circle on top; the bottom half of the rectangle was grey/brown colours, the top half was blue/greys, then there was a thin stripe of greeny colours and finally the golden dome.

They decided to use black card for their picture and I demonstrated how to fill the paper with a simple outline on Z's card. Then we talked about how to achieve a starry sky effect and I told them about splatter painting.

First, they tried dipping their paintbrushes in white paint and flicking their wrist to get the paint to splat onto the background... It was a little difficult to get a strong enough flick and to not accidentally touch the paintbrush to the card! Then they tried running their finger through the bristles and found this a lot easier to flick paint onto their picture - but the stars effect was smaller. They also used a small paintbrush to dot stars on too (Z only wanted to dot with the paintbrush!).

While the paint dried, we looked through our scrap paper and old supermarket magazines (free from the till!) to choose materials which matched the colours they wanted. I demonstrated how to rip the pieces into smaller ones (telling them they could cut with scissors if preferred) and laid them out over one of their pictures. We talked about which looked more effective: lots of different smaller different pieces or just one big piece cut to size... They preferred the first option!

After around 1 hour of independent work, the three ended up with these:


(F, M, Z)

Tuesday, 19 November 2019

Arabic update

The twins have completed Madinah Arabic Reader Book 1 with me and we've just started Book 2, mashaAllah.

Their understanding is pretty good, as we read through the first chapter together and they had no issues with the content.

Current targets:
1) To be able to read more fluently (just need more practise, ideally daily!)
2) To be able to write simple sentences (they can spell words but don't have the confidence to write, especially joined... I need to give them more opportunities to do so!)

One of the grammatical concepts in the current chapter is the idea of the object of a verb in a sentence needing a fatha (and revising the subject needs a dhamma), i.e. "Tuhibbu al-baqaratu al-kitaaba" means "The cow likes the book" [as opposed to "Tuhibbu al-baqarata al-kitaabu" meaning "The book likes the cow"]. So we did some work on the whiteboard to this effect, using different familiar verbs and objects and emphasising that the order of the sentence isn't important, but the meaning comes from the vowel sound on the words.

Then the girls (Z included!) drew and painted a picture of 5 foods they liked to eat (so we could practise the verbs eat, like and want). They painted them with cottonbuds and a dot effect (I'm trying to introduce them to different art techniques where I can within other subjects, as we don't really have a set "Art" time atm!)


Wednesday, 1 May 2019

Simple Spring/Summer Plant Projects

As I mentioned in my earlier post, we're taking a break from formal academic studies over Ramadaan so we can concentrate on our Arabic and Quran. But I don't mean we're going to stop learning altogether - that's impossible anyway! Just that we'll discuss things as they come up rather than do planned lessons (they'll still cover plenty of Literacy/Numeracy targets naturally through reading/everyday experiences/etc.), but I thought it made sense to keep a loose Science focus by getting all the books (both fiction and non) out for their book box for the month, since it's the season for growing things anyway!

So we've got a few projects on the go at the moment...

1) Tulips from Amsterdam

The ones my parents gifted us a few months ago have begun to bloom - some seem to have died! The second pot weren't buried deep enough, as when it rained the soil was compacted and so exposed them again, so I asked my husband to help the twins replant them while I was out one day... Still no success compared to the others, so I had a look myself and realised they'd been planted upside down! Replanted (so for the 3rd time lol) in an attempt to save them but it looks like it was unsuccessful... But still a good teaching point into why they didn't grow so nothing lost there!


The ones which have blossomed look beautiful though. 👍

2) Chinese beans

My sister brought some beans back from China (wish I'd remembered to take a photo of them before planting as they had Chinese characters written on them!) though she's not sure what species they are exactly. 😂 So we decorated some old glass honey jars with the girls' names and planted the beans in there. I'm hoping the glass means we'll be able to get a peek at some of the roots! These are on our kitchen windowsill so it's easy to remember to water them and easy to keep an eye on the different stages of growth. 😁

3) Sunflower investigation

A few years ago we grew some sunflowers in the back garden which grew to an impressive height, taller than the fence! When we grew them, I decided where to plant them based on where I thought would get the most sunlight... So this year, I suggested an investigation to see if the amount of sunlight really makes that much of a difference to how plants grow. So we planted a few on the side of the garden the original sunflowers went and a few on the opposite side of the garden, in the shade of the fence. No mention of soil quality at this age - we're making sure to water them both the same amount and assuming that the only factor being changed is amount of sunlight!

Unfortunately, our poor sunflower seedlings have had a rough start... One week, my husband forgot they were there and we lost a few to the lawnmower. 😑 But rather than give up, we replanted the ones which seemed mostly intact and Alhamdulillah a few survived! But then the next weekend it was incredibly windy (Storm Hannah I think it was called?) and from our survivors, there were a couple more casualties blown over or away completely! So now we have two strongish looking ones on each side, and maybe a couple of late sprouters which may end up growing to flower... Who knows! But again, some more interesting learning opportunities so no great loss. 😊


So for these, the girls need to remember to water them (usually when I'm putting out/taking in the laundry!) and also weed them when they look like they need it (why do they need weeding? So the other plants don't take their water and nutrients from the soil, so the sunflowers can grow bigger!). Maybe next year we can do another investigation where we only weed some sunflowers and leave the others to get overrun. 😀

4) Nature walks

The HE friend we went on the Clent Hills walk with is organising regular meet ups at similar locations for more long walks. We went to Clent Hills again on Sunday with my husband, to see how far Z could manage since some of the routes aren't pushchair accessible, and mashaAllah we were out for just over 2 hours (with stops!) and she was able to walk to the top and take the steeper route down again. The walks which are planned with our friend should be around 45min max, so inshaAllah we plan on joining them as they come up over the next few months.

Just being in nature sparked up lots of casual conversations and learning, e.g. what are pine cones for? How do trees breathe if they don't have lungs? Identifying different species of plants (daisies, dandelions, bluebells, buttercups, nettles, blackberry bushes, etc.), comparing the shapes and textures of leaves and petals, etc. etc.

The walks have also been great for building confidence (e.g. keeping balance when going down steeper, gravelly sections of path - thinking they can't do it then proving themselves wrong!), problem solving (looking for the sensible places to climb hills, i.e. less steep, not as muddy, good footholds, etc.) pushing past their comfort zones (they wanted to try climbing a bigger tree on Sunday and, with a little encouragement, managed to get higher than they have before!) and of course, building stamina and endurance. 💪

Monday, 22 April 2019

Spring Rainbows

So after the extended writing task we did previously, I decided to take inspiration from the Big Write initiative and continue giving the girls the opportunity to write a longer uninterrupted piece every fortnight.

As Spring has just begun, I decided to use it as the next prompt - as it was easy to get some firsthand experience and so start some good discussions encouraging rich vocabulary before sitting down to do the writing task.


You can download the writing prompt here.

Before showing the girls the task, I took them to Martineau Gardens so they could actually do the colour hunting challenge mentioned in the prompt. We took photos of the things they found and when we got home I turned these into a collage:


You can download our picture collage here. (the bird pictures I took from Google, since I wasn't able to get a good photo of the robin and magpie we spotted!)


On a different day, before writing, we used their photos as inspiration for a spring time rainbow painting. First, they drew the outline of a rainbow onto white card. Then, they used their photos as reference for drawing pictures in the corresponding stripe of each colour of the rainbow. Finally, they coloured it in using both wax crayons and watercolours - which was their choice! Z did her own version too, mashaAllah. I was really impressed with her patience, which I think is better when she's together with her big sisters as she wants to copy them!

When it came to the actual writing, I think I picked a day when they weren't in the mood for it... We recapped their current target of writing in past tense (and staying in the same tense!) then set the timer for 30min, put a video on YouTube for background Spring sounds, wrote in silence - just as in last time with the desert prompt - but they weren't that motivated this time. Rather than force them to continue or force the issue, I sat with them individually afterwards so they could give themselves feedback: a mark out of 5 for how well they kept in past tense (they both thought they did well at this), a mark out of 5 for how good their descriptions were and a target for next time. M especially was disappointed with herself ("I didn't write enough though!") so insha'Allah they might be more focused next time? I think going to the gardens, which I thought was good for inspiration, might actually have made it more difficult since they were trying to write from memory rather than their imagination? Will try something completely different next time, insha'Allah!


Tuesday, 2 April 2019

99 Names of Allah - 08 - Al-Muhaymin - The Guardian

[08] اَلْمُهَيْمِنْ (Al-Muhaymin): The Guardian


Sing 99 Names (5min)
Play PowerPoint of the first 33 names, 2-3 times. Sing together and do the actions so far plus:

Action for Al-Muhaymin: Cup your hands together in front of you and bring them in closed towards your chest.

Today’s focus is on the name Al-Muhaymin which means The Guardian.

Story relating to today's name (7min)
Read a short story to the children: story of Prophet Muhammad (SAW) and Abu Bakr (AS) hiding in the cave before hijrah to Madinah (e.g. from a book such as Goodnight Stories From The Life Of The Prophet Muhammad).

Talk about why they were hiding in the cave and how Abu Bakr (AS) felt when they heard the footsteps outside. What did the Prophet Muhammad (SAW) say to him? Why wasn't the prophet (SAW) worried? Why didn't the Quraysh look inside the cave? Because Allah (SWT) protected Prophet Muhammad (SAW) and Abu Bakr (AS) and kept them safe from harm.

(Since the versions involving a spider [and bird's nest] aren't 100% confirmed as authentic, we've chosen not to mention them at this stage)

Discuss meaning, apply to children's lives (15min)
Al-Muhaymin means The Guardian.

What is a guardian? Someone who protects you. Your parents are your guardians; they look after you and only want what's best for you. Guardians keep things safe - can you hear how it has the word "guard" in it?

Allah is Al-Muhaymin: he protects us and guides us towards what's good for us. We can trust Him to want what's best for us and that He has the power to keep us safe from anything!

A goalkeeper is a bit like a guardian: they make sure the goal is protected from the other team scoring. Play a quick game of indoor football e.g. using a soft ball and the width of the sofa as a goal.

But this name of Allah doesn't just mean guardian as in He protects us from bad things coming towards us - like the goalkeeper blocks the ball from going in the goal - Al-Muhaymin is more like Allah is overseeing everything; He's even watching for something which could harm us from faraway. Before we even know we might be in trouble, Allah has kept us safe from it. So before the ball is anywhere near the goal, it's already been moved away so it doesn't even get the chance to try and go in! Allah guards us in such a way sometimes we don't even realise we're being protected. SubhanAllah.

Craft activity (20min)
Complete the page for the book.

Allah is Al-Muhaymin, The Guardian, and protects us from harm like a mother bird her chicks - shelters them from e.g. the rain and also looks ahead to keep them away from danger in the first place.

Let the children colour and decorate their picture as they wish - use feathers for the birds or scrunched strips of paper for the nest, etc.

When to use this name (8min)
We can also be guardians of our own hearts, keeping them safe from evil. How can we keep our hearts safe from evil? By staying away from bad deeds or things which might lead to bad deeds, e.g. by only saying kind words (staying away from bad deeds, i.e. bad language) and by not listening to others when they use bad language (staying away from things which can lead to bad deeds, i.e. making us copy them). Can you think of any other examples?

Thinking of Allah as Al-Muhaymin can help us to stay on the right path by bettering our characters, remembering He always wants what's best for us as Muslims.

On the back of their page, help the children write a few thoughts about the name Al-Muhaymin and their feelings.

Sticker chart (5min)
Ask individually: Which of Allah’s names did we learn today? What does it mean? Give children a sticker each for their chart.

----------

Other activities:

- Explain that people sometimes use shields to protect themselves from harm, e.g. knights in medieval times, Roman soldiers, police during riots, etc. A shield is something you can hold in front of you to stop things from hitting you - if the idea is new to the children, play a quick game with cushions as shields and soft balls: gently throw the soft balls at the children for them to block with the cushion shield; compare what it's like with and without the shield!

- Make a play shield out of a large piece of cardboard and paints.

- Do something nature inspired to help look after wildlife, e.g. build a shelter for bugs/birds, put out food/water, etc. - link to being a guardian for Allah's creations.

- Where do you find guards? E.g. around something precious, such as jewellery. Allah is our guardian because we've been given the gift of Islam. Our faith is something we must protect. Draw/make a simple piece of jewellery e.g. a necklace or bracelet and write a message of affirmation on it e.g. "I am a Muslim". Talk about guarding it and keeping it safe.


P.S. To keep our 3 year old occupied whilst the twins worked on their pages, I did this simple bird picture with her:


Sunday, 10 March 2019

Lapworth Museum

We visited Lapworth Museum to learn about skeletons and fossils in a little more detail - mainly to see the allosaurus on display!

The museum doesn't open until 12pm on a weekend (I thought it opened at 10am ) so we arrived on campus half an hour before opening time... But alhamdulillah the weather was fine so we used the time for a quick trip down memory lane - we walked through the university centre (where everything was closed lol) and up the stairs to one of the lecture theatres, but it was locked! And past the Old Gym (which isn't so old anymore!) where my husband and I met. 💕😂 The campus was pretty much dead when we arrived but by midday lots of people started arriving - so we used all this for a short discussion about uni life and student habits. 😀


Inside Lapworth, we looked at all the skeletons on display - revising our work on herbivores/carnivores and using fossils for clues. F had recently asked if there were any flying dinosaurs to which I'd answered pterodactyl, and fortunately there was one on display hanging from the ceiling.

allosaurus cast

pterodactyl cast

allosaurus skull - feel its teeth!

another carniverous dinosaur...

hippopotamus skull

Most of the exhibits just showed parts of the skeleton as opposed to the whole thing, eg the femur of a stegosaurus, so there were some good opportunities to revise bone names and find the equivalent on their own bodies.

Surprisingly for me though, the part of the museum they enjoyed the most was looking at all the different rocks and gemstones upstairs!

rock wall - feel and describe their textures!

my favourite stone because it's my favourite colour~
their feedback in the bottom right!

We managed to look around the whole museum comfortably in just over an hour. Definitely somewhere worth visiting again next time we're on campus or when it ties in with another topic inshaAllah!

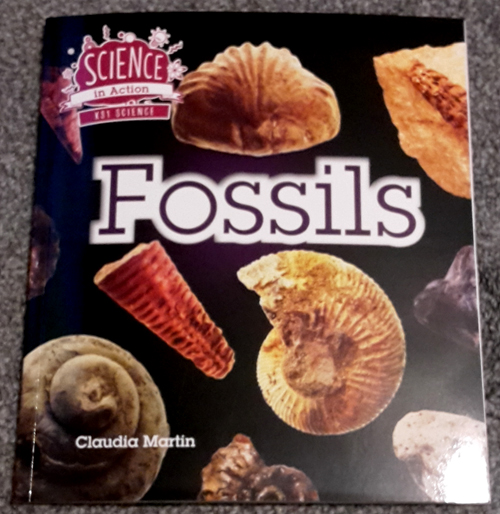
When we got home, I put out the Fossils book we have:


I really like this book series, but this served as a reminder how careful we need to be with the educational material we give to our children - especially when it looks like a trusted source - since the last few pages of the book are dedicated to the theory of humans evolving from apes and present it as non-disputable fact:


I don't wish for the girls to grow up sheltered, so I thought since it came up we may as well discuss it. Rather than censor the page completely, I decided to stick some flaps over the top instead with the following:


So the girls can still see the information underneath, but they can treat it in the same way as they treat beliefs from other religions.

We also spoke a little about scientific theory and how the principle is correct, to have a prediction and look for evidence (just like we do for our experiments!), but how important it is not to have preconceived biases or we end up with the wrong conclusions.