Showing posts with label non-fiction. Show all posts

Friday, 14 February 2020

Writing Informal Emails

Part two of learning about letters was to compare to writing and sending emails!

First, the twins did a comprehension exercise based on an email text (from this book) and we talked briefly about the conventions in layout: the email subject, email addresses, the similar layout in terms of paragraphs and a "Dear...", "From..." beginning and end.

Then, I set up email accounts for the girls - including Z, as she had written a letter and posted it too - using Gmail. In hindsight, I wish I had adjusted their birth years so I could automatically forward their emails to mine (Google doesn't allow automatic forwarding for child accounts! And neither can I add their accounts to my phone as I set my email as the parent account which is already signed in on my phone... Settings might get confused, apparently, so it's not possible 😖) as now I need to manually log in to their accounts to check for replies... But this is a lesson in itself for them re: the conveniences of snail mail vs electronic! It may arrive there straightaway but that isn't much use if you forget to sign in and check. 😂

They watched me set up their accounts (the username F wanted was already taken so we added a number to the end; we talked about how usernames/email addresses are unique for everyone in the whole world!) and came up with a password (their first one lol... I set all 3 as the same for ease 😝).

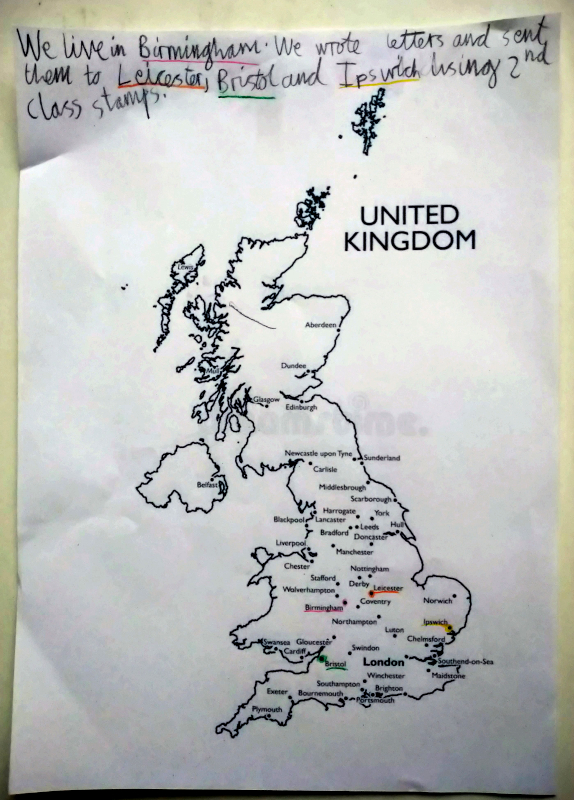
When they composed their emails, in turn, we looked at the layout of the inbox, how to write an email by clicking "compose", what the subject line is for and where to put the recipient's address. They wrote a simple email to the same aunts they had sent letters to, explaining they were comparing the two forms of communication, and added emojis to their emails (which they enjoyed the most lol).

We talked about how email is free to do, how long it takes to arrive, the convenience of not needing to physically buy stamps or walk to a postbox and how mistakes in an email can be easily corrected, compared to rubbing out or crossing out written mistakes in a letter. We also didn't need to write the date or our own address because it was put there automatically for us.

So what could be the benefits of sending letters by post? Because you don't have to remember to check for a reply, it just comes! And if you want to send something (like Nani sent a present in the post to us) then you can't email it, you have to post it... And it's fun getting post. 😂

Tuesday, 11 February 2020

Writing Informal Letters

I bought the books The Jolly Postman and Dragon Post from Amazon as an introduction to the topic. We also watched the relevant episode of Let's Play on Amazon Prime (the twins are getting a bit old for this but still enjoyable for Z!).

We looked at the layouts of the different letters in the books to see if there was anything they all had in common - what were the features of a letter? Was there a difference between letters from friends (informal) and letters from businesses (formal)?

On a piece of coloured A4 paper, we wrote our own example letter (to Julian from Aunt Fanny - Famous Five themed again, their choice!) then glued in the centre of A3 paper and annotated it with the features we came up with.


Why is it useful to write your own address in the corner? So the recipient has it if they want to send a reply! Why is it useful to have the date? Because the letter won't arrive straightaway so it's good to know when it was sent!

We talked about how letters get to where we want them to go to and watched a couple of YouTube videos about Royal Mail - one posted only a few years ago and the other 10 years ago. We talked about how clever the machines were and how they hadn't really changed in 10 years... But before the machines were invented it must have taken a lot longer and been a lot more difficult!

We thought about who they could write letters to - who lived in the UK but not in Birmingham? Z cleverly commented there was no point wasting money posting letters to people in Birmingham because we could just give it to them instead! After going through all the possibilities they decided to write a letter each to some of my sisters living in different places (at school in Ipswich, university in Bristol and work in Leicester!). We thought it would be interesting to see if they would all receive their letters at the same time if we posted them all into the same postbox at the same time...

We looked into the difference between 1st class and 2nd class post. 1st class is meant to arrive the next working day ("What's a working day?!") including Saturday; 2nd class can take 2-3 working days to arrive. So we decided to use 2nd class for our experiment. We also talked about which kind of stamp cost more and why.

They wrote their letters, using the annotated poster from before as a guide, and we talked about the conventions of an envelope: stamp in the top right corner, address in the centre with the recipient's name at the top & postcode at the bottom, return address on the back.


We walked down the road to the nearest postbox for them to post their letters. While there, we read the information about last collection times and looked for the keyhole and handle to open the postbox. M was pleased she could explain what the "line" was down the side of the postbox - it's the door! It was a bit of a cold, windy day (remnants of Storm Ciara from the weekend!) so we talked about the inconvenience of needing to go out to send a message to someone faraway, as opposed to the technology nowadays of phones, emails and WhatsApp, etc. - all of which are sent straightaway and don't take days to arrive!

I found a simple map of the UK on Google Images which had Birmingham, Leicester, Bristol and Ipswich marked and printed it out for the girls. They needed to find the four cities and colour them different colours, then write a couple of sentences to explain what we had done.


When the letters arrive InshaAllah they can add at the bottom how long it took for their aunts to receive them! They're expecting Ipswich to maybe take longer because it's the furthest away, and Leicester to be delivered the quickest, but we'll see. 😁

Wednesday, 9 January 2019

Stars, Asteroids, Comets & Meteoroids

Some highlights from our Space unit:

What is the sun? What are stars made from?

We read through a variety of non-fiction books from the library to research the answers to these questions... The sun is the star around which the planets of our solar system orbit. F cleverly commented from this, "Does that mean that if there were planets going around other stars, they would be like the sun for those planets?" 😍👍

Stars are made from lots and lots of tiny pieces of dust and gas hitting against each other, and every time they do they create heat and light (a nuclear reaction!). 💥 I needed to briefly explain what I meant by a "gas" (it's like air; it's all around us and we breathe it in and out... like when we boil water and you see the steam coming up, that's the water changing into a gas... They seemed to grasp the basics but changes of state is now a topic I want to cover soon with them, insha'Allah!) but they seemed to get the idea of it.

To help demonstrate, I took out a box of matches (quick recap on fire safety with them). When I hit the match head against the box, it made fire: heat and light. A similar thing is happening inside a star, except lots and lots of tiny reactions are happening all at the same time. (The girls then had fun taking it in turns to blow out the matches I struck 😂)

Stars grow old and die when all the nuclear reactions are finished - similar to the matches, once it's been used, can it be used again? No! (We tried one to make sure!) So one day the sun will burn out, too... When? Scientists have predicted it to happen a long long long time after our lifetimes (billions of years from now!). The book we were reading explained what would happen to the Earth if there was no more sun - everything would die because it would be too cold - so I asked the girls if they wanted to be alive to see that happen... One said yes, the other said no! Then the conversation moved to talking about the Day of Judgement, because maybe that would happen before the sun burnt out anyway; only Allah knows.

What's the difference between an asteroid and a comet? What is a meteor?

We read through this brilliant find from the library: Our Solar System - Asteroids, Comets and Meteors to learn about these smaller objects found in space. After reading it together, taking it in turns to read paragraphs, captions and fact boxes, I wrote the keywords on the whiteboard: asteroids, comets, meteors, meteoroids, meteorite. Then I asked the girls to tell me what each one meant, i.e. give a definition. If they couldn't remember exactly, what could they do? M said to look in the glossary. 👌 And if they wanted even more detail? She said they could just go back and read the pages in the book again!

So the definitions we came up with were:

asteroid: made from rock and metal; orbits the sun
comet: made from rock, dust and ice; orbits the sun
meteoroid: piece of asteroid or comet
meteor: the streak of light made by a meteoroid burning up in the Earth's atmosphere
meteorite: a meteoroid when it hits the Earth

I learnt something new, too, as I didn't know the difference between any of them! Then I made a simple diagram of this information for them to fill in the blanks as a worksheet.


You can download our worksheet here.

The purpose of this exercise was to highlight how useful diagrams can be as opposed to blocks of text, rather than getting them to memorise the definitions for asteroid/comet/meteoroid/etc.

Why are diagrams useful? Because pictures can help us understand things quicker and/or easier! Which kind of fact book would they prefer to read: one with diagrams or one without? Why? Then I asked them to find me an example of an effective diagram (one which they liked because it was clear and helped them to understand something easily) from one of the non-fiction books we had taken out from the library.

Finally, we followed the instructions in the back of the book to make our own comets from foil and ribbon. Z made one too, with my help. After they threw them around a bit, I got them to climb onto the sofa (climb into space!) and throw their comets down to try and hit a cushion on the floor. Whenever they got a hit, we all cheered, "You made a crater!" - to reinforce that the impact from a meteoroid hitting the Earth makes a big dent in the ground. 😁


Later on, I found them throwing their comets down the stairs. 😂

Tuesday, 2 October 2018

Making Gingerbread Men

Cross-curricular Literacy and Numeracy skills in a real-life setting. 😜

Continuing with our fairytales theme, it made sense to make some gingerbread men! After re-reading the story, we looked at the recipe together (revising our work on instructions).


INGREDIENTS
For the biscuit:
100g butter (softened)
175g brown sugar
1 medium egg (beaten)
4 tbsp golden syrup
3-5 tsp ground ginger
1 tsp bicarbonate of soda
350g plain flour

To decorate:
75g milk chocolate
Smarties, sultanas, sprinkles, etc.

METHOD
1) Cream together the butter and sugar using an electric hand whisk.
2) Beat in the egg, followed by the golden syrup, using the whisk.
3) Mix together the ginger, bicarbonate of soda and flour in a separate bowl.
4) Stir the dry mixture into the wet mixture using a wooden spoon, a little at a time, until it begins to form a dough. Once all the flour has been added, work it together with your hands to make a ball.
5) Leave to chill in the fridge for 20min.
6) Pre-heat the oven to 180°C and line 2 baking trays with greaseproof paper.
7) Roll the gingerbread to 1cm thick, cut out shapes and place on the trays.
8) Bake for around 10min until golden brown. Leave to cool completely on a wire rack.
9) Decorate using melted chocolate as a "glue".

You can download our recipe sheet here. The ginger in this recipe is quite mild (for Papa's sake!) so you may want to increase accordingly.

Usually, I pre-measure the ingredients so the girls can just concentrate on the baking, but this time they weighed and measured everything themselves - which ties in with their next Numeracy topic on length, weight and capacity. (The cm reference in the recipe was new to them! But a good conversation starter 👌)

How I set up the table ready for them to decorate the gingerbread men:

I demonstrated how to do one: take a gingerbread man from the bowl, dip its feet in the chocolate then in the sprinkles, lay it flat on your plate, take one of the Smarties and dip it in chocolate then stick on the gingerbread man's tummy, repeat for another one of the Smarties, put the finished gingerbread man on the big plate. Then I left them to it - only helping to refill the bowl and change the big plate to an empty one - and mashaAllah they did all 26 without any problems, the 2 year old included! In the past, we've used sultanas for eyes and drawn mouths with icing... But with the baby, this was simplest for today. 😋

----------

While we were waiting for the gingerbread to cool down before decorating, I decided to use the Smarties as a way of practising the work we'd done so far on tallying and bar charts - simply by having the girls tally the different colours in the packet and draw a graph of the results.


I had them predict which colour they thought would be the most common before they started - which added to the fun as they tallied - and the colouring in at the end was optional, but they both decided they wanted to do it. 😊

You can download our worksheet here. Feel free to edit as you wish - I'll probably use this template myself in different contexts and will change the questions at the bottom to practise different ways of analysing data. 👍

Tuesday, 8 May 2018

Instructions (part 2); Recipe: Nutella-Surprise Fairy Cakes


To complete our work on instructions, I helped the girls bake some more cakes (any excuse for cake!), taking photos along the way, then printed these photos off as a memory aid to help them write their own set of instructions.


I cut the photos out and mixed them up, so the girls' first challenge was to order the pictures. Then they stuck them down on the A4 template, filled in the ingredients list and wrote their instructions on the next page.

You can download our worksheet template here.

Here's the recipe we used:

Ingredients:
2 eggs (120g)
120g softened salted butter
120g caster sugar
120g self-raising flour
1tsp vanilla essence
1tbsp whole milk

6tsps Nutella
70g melted milk chocolate
2 Kinder Buenos

Method:
1) Preheat the oven to 180C fan, line a baking tray with cake cases and weigh out all the ingredients.
2) Beat together the butter and sugar until light and fluffy.
3) Whisk the eggs, vanilla essence and milk in a separate bowl then beat into the cake mixture.
4) Sieve in the flour and fold it in gently.
5) Divide the mixture evenly between the 12 cake cases and bake for 14min until lightly golden brown.
6) Leave to cool on a cooling rack.
7) Cut out the centres from each cake, fill with 1/2tsp Nutella and replace the centre as a lid.
8) Spread the melted milk chocolate on the top of each cake and decorate with 1 square of Kinder Bueno.

Saturday, 5 May 2018

Instructions (part 1)

Our next non-fiction text - instructions seemed like the logical thing to explore after lists.

We began by looking at different examples of instructions via comprehension worksheets (two birds, one stone? 🐦🐦) and I asked the girls what similarities they noticed between the different instructions... They noted that instructions are written in a list (How do you know? "Because the lines are underneath each other and they have numbers on the side" 👍) and they have another list of what you need, too (in recipes, this is the list of ingredients!). What are instructions for? "So you know what to do!"


After the girls completed a few comprehension sheets and so were familiar with a number of examples (we did 5 in total, from Letts Monster English – Reading (Age 5-6), Collins Easy Learning – Comprehension (Ages 5-7), Letts Make It Easy… Maths & English (Age 5-6) and Letts Make It Easy… Maths & English (Age 6-7)), they then had a go following a set of instructions of their choice: they decided to make Monster Masks, as in one of the comprehension worksheets, so I wrote the instructions on the whiteboard for them to follow and helped where needed (including the toddler!):

Thursday, 15 February 2018

Different Kinds of Lists


Introducing another kind of non-fiction text: lists!

We use lists all the time anyway: shopping lists (which they see every time we go to Asda, sometimes reading them out to me as we go round), To Do lists (often I write these on the whiteboard e.g. as a plan for the day or the week), etc. etc. They even include them in their play, sometimes taking out a notepad and pencil/pen and copying words from their posters into a list...

So it wasn't much to just clarify and teach them the basic features:

- lists go down the page
- start a new line for a new thing
- they can have bullet points
- or they can be numbered
- they need to have 3 or more things

That's it!

Then I gave them each a piece of paper with two titles on it: "A List of Animals I Like" and "A List of Things I Like To Do". They needed to complete the first list using bullet points and the second list using numbered brackets. I showed an example of each on the whiteboard then left them to it until they got bored. 😂 One wrote the lists pictured above; the other did about 7 animals and 3 things to do lol.

I decided to save writing a list using commas for another day, as that's slightly different in terms of format and learning about punctuation. 😊

Sunday, 7 January 2018

Naming Deciduous and Evergreen Trees

To finish off our topic on trees, I made a worksheet for them to sort 10 different trees into either deciduous or evergeen and then identify each tree by name by looking in a book.


We used the RSPB First Book of Trees (we found ours in our local charity shop for 49p!) as a reference point, which linked in with our work on non-fiction texts and using "fact books" to find information.

After cutting everything out, they began by sorting the pictures into deciduous or evergreen by focusing on the leaves - looking at their colour and shape. After they glued the pictures into the correct boxes, they took it in turns to look through the book for each name and try and match it to a picture. I deliberately chose photos which resembled the ones in the book to make it easier. 😛 So they read the relevant page out loud, looked at the images and compared what was there to what was on their sheet. Then they glued the label next to the correct picture.

They found the trees in the book either by using the Contents page or just by flicking through the pages - which led to a discussion into the benefits of having a Contents page!

You can download the worksheet here.

Since doing this work, it's been interesting to see the girls point out familiar trees by name when we're out and about, or ask to check if they've guessed correctly: "Is this a holly???" 😁😁